Apple Homekit Jablotron 100
- Jun 25, 2018
Enabling Homekit and Siri for Jablotron Alarms
"In the beginning of 2017 I bought and installed a Jablotron JA-100 alarm system in my home, it was easy to install, works great and offers a lot of options for automation which is great since I've automated 90% of the stuff I do in my house. However it was missing 1 feature, Homekit. Let’s fix that!"
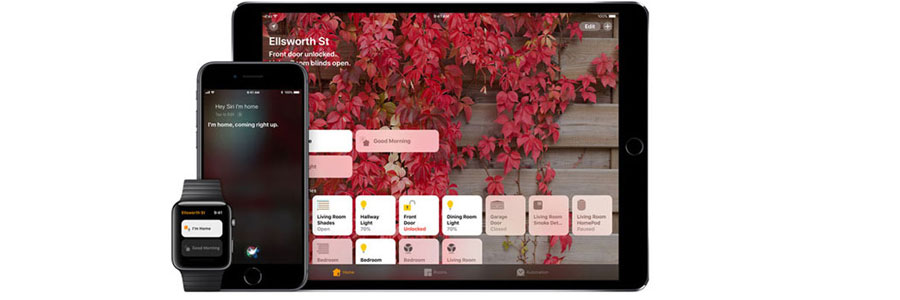
If you are unfamiliar with Homekit, it’s Apple’s home automation integration, it basically bundles all of your smart devices in the Home app and lets you control it from 1 app, share access to family and friends, but most importantly provide a secure gateway for remote access and location based automation. See: https://www.apple.com/ios/home/
The objective for the Jablotron Homekit integration is:
1. Arm and dis-arm the alarm based on location
2. Have other devices perform actions based on the status of the alarm
3. Include the alarm in scenes
4. Control Jablotron from the Home app
5. Control Jablotron with Siri
Since Homekit isn’t enabled on Jablotron we need a bridge to connect Jablotron to Homekit, we will be using Homebridge for this.
What is Homebridge?
Homebridge is a lightweight NodeJS server you can run on your home network that emulates the iOS HomeKit API. It supports Plugins, which are community-contributed modules that provide a basic bridge from HomeKit to various 3rd-party APIs provided by manufacturers of "smart home" devices.
Components
Components used in this instruction:
- Raspberry PI Zero W
- Raspberry Pi Zero case
- USB charger + Micro USB cable
- SD card (32gb) with Jessie Lite installed
- Jablotron JA-101KR LAN w/ GSM and radio
- Router with WiFi
The above components can be changed out to your liking, just make sure you check the compatibility with Homebridge.
Homekit dependencies
In order to use Apple Homekit you need to make sure you meet Apple’s requirements, most notably the requirements on automation and remote access.
Installation options
Following along this tutorial should be quite OK, but you have a few options to get this up and running:
1. Follow along this tutorial
2. Download the prepped OS at:
3. Use an existing Homebridge installation
4. Download the Homebridge for Raspberry Pi app which will do all the installation work for you https://itunes.apple.com/nl/app/homebridge-for-raspberrypi/id1123183713?mt=8
Preparing the OS
For our OS we will be using Jessie Lite, get the latest version from: http://downloads.raspberrypi.org/raspbian_lite/images/
Follow the instruction on how to install it on your SD card: https://www.raspberrypi.org/documentation/installation/installing-images/
Please read the included README.txt
After installing the OS on the SD card, perform the following steps:
1. Open the SD card in Finder or Explorer and go the root / home folder
2. Create an empty file called “ssh.txt”, this will enable us to SSH into the Pi
3. Create a second file called “wpa_supplicant.conf” with the following contents:
ctrl_interface=/var/run/wpa_supplicant
network={
ssid=“your_wifi_name”
psk=“your_wifi_password”
}
This will make sure that the Pi connects to your WiFi.
Alternatively you can use the command line to perform these commands.
Prepping the Pi
Insert the SD with OS into the Pi, close the case and hook the power up. Verify that it works, by
checking if the Pi’s light is blinking.
Lets get started
Now that we have all our components and software its time to boot up the Pi for the first time, installing the plugins and connecting it your Homekit. If you have downloaded the prepped OS then skip until the next steps and go straight to “Connecting to Homekit”, if you have an existing Homebridge installation skip to “Installing Jablotron plugin”
Connecting to the Pi
After the Pi has booted, open the terminal on MacOs or use an SSH client such as putty on Windows. On MacOS connect via the terminal with the following command:
- ssh pi@raspberrypi.local
The default password should be “raspberry”. After logging in the first thing we will do is change the password by executing:
- passwd
Installing Homebridge and required packages
Installing Homebirdge can sometimes be a bit difficult, mostly due to different versions of Pi’s, OS’s, etc. So the following steps should help you to get it up and running but its best to check the latest installation guide on and preferably follow that guide: https://github.com/nfarina/homebridge/wiki/Running-HomeBridge-on-a-Raspberry-Pi
Make sure you are connected to the Pi and execute the following commands one by one:
- sudo apt-get update
- sudo apt-get upgrade
Install Git:
- sudo apt-get install git make
Install Node:
- curl -sL https://deb.nodesource.com/setup_6.x | sudo -E bash -
- sudo apt-get install -y nodejs
- sudo apt-get install -y build-essential
Set up NPM:
- mkdir ~/.npm-global
- npm config set prefix ‘~/.npm-global’
- export PATH=~/.npm-global/bin:$PATH
- source ~/.profile
Install Avahi:
- sudo apt-get install libavahi-compat-libdnssd-dev
Install Homebridge:
- sudo npm install -g --unsafe-perm homebridge
Start Homebridge at boot of the Pi:
- sudo apt-get install screen
Edit the file by executing:
- sudo nano /etc/rc.local
Add this line before the exit 0 line:
- su -c "screen -dmS homebridge homebridge" -s /bin/sh pi
Press CRTL + X to save and exit.
Installing Jablotron plugin
At this moment the package isn’t on npmjs so we will install it from Github by executing the following command:
- npm install -g homebridge-jablotron
Creating the homebridge config
On the command line and create the config file:
- nano ~/.homebridge/config.json
If the config is empty, add the following to the file, otherwise proceed to changing the credentials:
Ask credex alarm systems...!
Configuring Jablotron services
Based on the output of the configuration tool you can decide what services you add to the configuration. Typically there is single service configured (eg for home) but some people might have more services defined (eg home & office)
Each service needs to be configured following attributes:
- id: mandatory, ID of service obtained by configuration tool
- name: mandatory, defines a name of a service
- username: mandatory, your Jablotron username, it is advised to create a new account for the sole purpose of controlling the alarm via Siri and limiting the authorization on that account.
- password: mandatory, corresponding Jablotron password
- pincode: mandatory, corresponding PIN code for Jablotron unit
- autoRefresh: optional [default value true], enables autorefresh mode that automatically polls the Jablotron status in interval defined using pollInterval attribute
- pollInterval: optional [default value 60], defines an interval (in seconds) in which plugin periodically checks for service's and its accessories' states
- refreshOnStateChange: optional [default value true], enables automatic refresh upon arm/disarm. This is typically used if you have other Jablotron accessories (eg outlets) set up and configured to automatically switch on/off based on alarm state
- debug: optional [default value false], provides more verbose and detailed logging. Set it to true in case of some issues only!
Configuring Jablotron sections & accessories
For each service there needs to be at least one accessory defined. The available accessories can be obtained using configuration tool
The accessories are of 3 types:
- section: this is standard segment mounted on Jablotron keyboard unit
- switch: this is a switchable (PGM device) accessory connected to Jablotron unit (eg hooter/sirene)
- outlet: this is an outlet (PGM device) connected to Jablotron unit
The configuration above defines:
- 3 sections/segments
- 1 switch for hooter/sirene
- 1 outlet that turns on/off security camera
Each accessory needs to be configured using following attributes:
- name: mandatory, name of the accessory (this will be shown in Homekit and typically corresponds to the name defined in Jablotron setup)
- segment_id: mandatory, ID of a segment assigned in Jablotron setup
- segment_key: mandatory, key of a segment assigned in Jablotron setup
- keyboard_key: optional, is used to define a segment keyboard in order to support partially armed state (see below). Please specify the value only if you have Jablotron segment/section configured for partially armed state!
Support for partially armed state
If your Jablotron alarm was configured to support partially armed status, ie where single click on segment's arm key partially arms segment and double click on segment's arm key arms segment fully, you are able to configure the same in Homebridge as well. All you need to know is keyboard key of segment's keyboard. To obtain this information proceed with steps for 'Identifying Jablotron services and devices' below.
Connecting to Homekit
On the command line, execute:
screen -S homebridge
homebridge
On your iOS device open “Home”, click on the plus icon in the top right corner, click “add accessory” and scan the QR code displayed in on the command line.
Exit homebridge on the command line by pressing CTRL + Z, followed by executing the command:
sudo reboot
The Pi will now reboot and after a couple of minutes it will be back online and Homebridge will be up and running.
Homekit integration
The alarm integrates into Homekit as standard security alarm device. Homekit supports 4 states:
- Home (Stay)
- Away
- Night
- Off
Home/Away/Night are all of "On" state and indicate an armed alarm Off indicates disarmed alarm
Jablotron alarm supports 3 states only:
- Disarmed
- Partially armed
- Armed
Disarmed is mapped to Off in Homekit. Partially armed is mapped to Home in Homekit. Armed is mapped to Away
Usage
Now that we have connected the Pi to Jablotron and our Homekit we can start to control the Jablotron 100 alarm system via Homekit but also automate it.
The current setup of Jablotron as an Alarm System in Homekit requires user authentication when executing automations. For example when the first person arrives home, turn the alarm off. This will prompt a notification on your iOS device or watch asking if you want to execute this command.
This works every time and has the added benefit of being more secure, alternatively it is possible to make the Jablotron alarm appear as a switch and then the automation will work without confirmation.
If you want to use Siri for controlling the alarm, you need to create a scene, which switches the alarm on or off and then ask Siri to set that scene.
Identify Jablotron services and devices
Make sure all the segments on the Jablotron unit are disarmed prior running this utility - this will ensure keyboard detection for partially armed state works as expected: To identify Jablotron services and devices (segments and PGMs) run the config-helper.js, this will get all services and related segments that are assigned to your account.
cd /usr/local/lib/node_modules/homebridge-jablotron node config-helper.js username password
For more information please contact us.

